What is This Recipe?
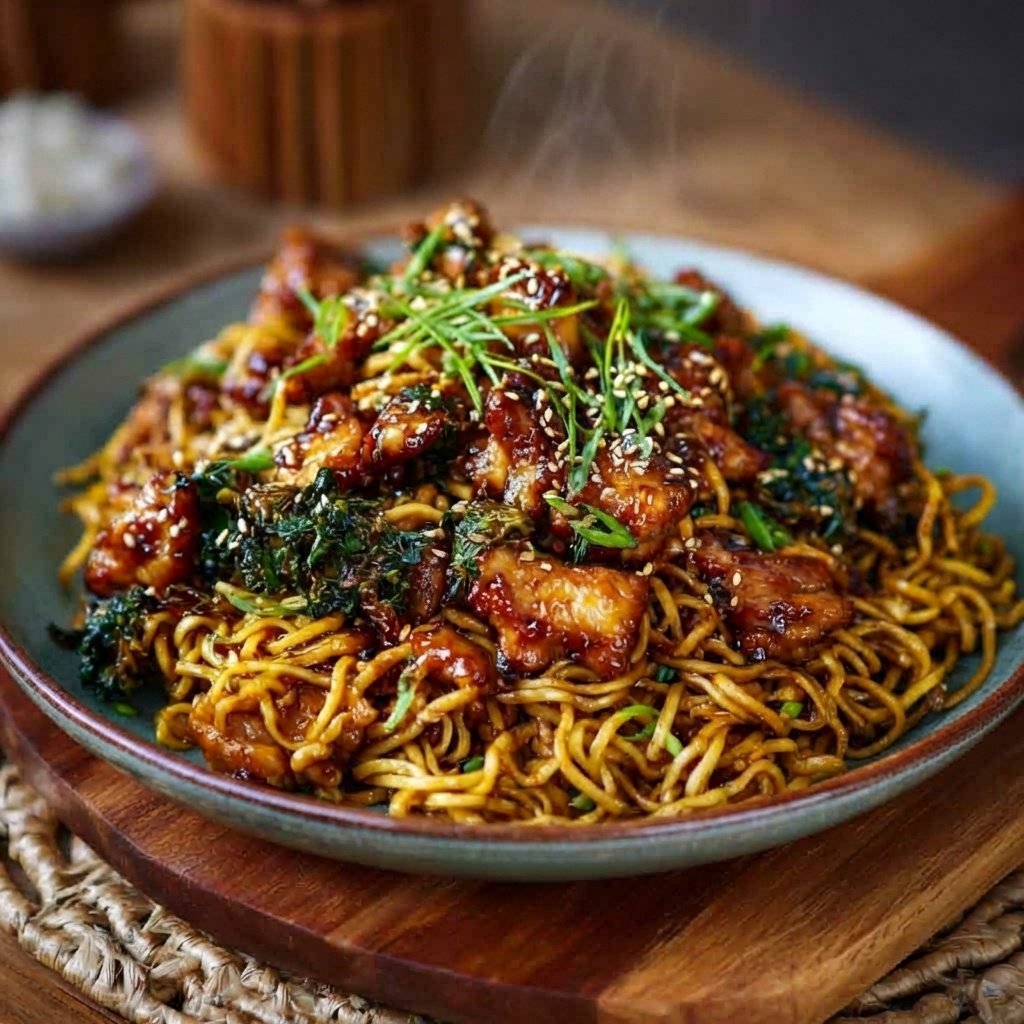
This is the Ultimate Sticky Garlic Chicken Noodles recipe—a mouthwatering, one-pan wonder that delivers restaurant-quality flavor in under 20 minutes. It features tender, juicy chicken and perfectly chewy noodles, all enveloped in a glossy, sweet, and savory garlic sauce that’s absolutely guaranteed to become a family obsession. When I first developed this recipe, I was aiming for that perfect takeout-style sticky texture without the fuss, and after countless tests (and a few too-salty batches), I landed on this proven, effortless formula. It’s the perfect solution for busy weeknights, yet impressive enough for casual entertaining. The magic lies in a simple, balanced sauce and a quick-cooking technique that ensures every single strand of noodle is coated in that incredible, garlicky goodness. Forget complicated ingredient lists; this recipe uses pantry staples to create something truly heavenly.
Why This Recipe is a Must-Try
In a world of complicated dinner plans, this recipe stands out as an instant classic. It checks every box: it’s incredibly fast, uses simple ingredients, is endlessly adaptable, and delivers a flavor punch that will have everyone asking for seconds. The sticky garlic sauce is the true star—a perfect harmony of umami from the soy sauce, sweetness from honey, a touch of acidity from rice vinegar, and the aromatic punch of fresh garlic. Unlike many Skinny Taste Recipes that focus on lightness, this dish celebrates bold, satisfying flavor while remaining a Healthy Chicken Recipe at its core, especially when loaded with vibrant vegetables. It’s also a fantastic way to repurpose leftovers, making it a close cousin to Rotisserie Chicken Recipes. Whether you’re a novice cook or a seasoned pro, this dish is a guaranteed crowd-pleaser and a game-changer for your Dinner Recipes rotation.
5 Pro Tips for Making Perfect Garlic Chicken Noodles
Achieving that perfect, glossy, restaurant-style finish is easier than you think. Follow these insider secrets for foolproof results every single time.
1. The Garlic Rule: More is More
For a truly amazing garlic sauce, don’t be shy. Use fresh garlic and mince it finely—a microplane or garlic press works wonders here. The key is to add it at the right stage. We’ll add some to the chicken marinade for depth and the majority to the sauce for that front-and-center aromatic punch. Toasting the minced garlic slightly in the pan before adding the sauce can unlock a nuttier, more complex flavor, but be vigilant—burnt garlic is bitter. It should smell fragrant and just begin to turn golden.
2. Master the Sticky Sauce Slurry
The “sticky” factor comes from a cornstarch slurry. The critical step is to whisk the cornstarch with a cold liquid (water or broth) until completely smooth before adding any other sauce ingredients. This prevents dreaded lumps. When you add it to the hot pan, the sauce will transform from thin and watery to luxuriously thick and glossy in just 60-90 seconds. For a clearer, glossier sauce, you can use arrowroot powder as a 1:1 substitute.
3. Noodle Prep is Non-Negotiable
Your noodles should be cooked al dente—slightly firm to the bite—and then rinsed under cold water to stop the cooking process. This prevents them from turning to mush when you toss them in the hot sauce. Toss them with a tiny drizzle of neutral oil (like avocado or canola) after rinsing to keep them from sticking together while you prepare the other components. This small step makes the final stir-fry so much easier.
4. High Heat is Your Friend
A screaming hot wok or large skillet is essential for proper Garlic Chicken stir-frying. It creates the wok hei—that signature smoky, seared flavor—and ensures your chicken gets a beautiful golden crust without stewing in its own juices. Don’t overcrowd the pan; cook the chicken in a single layer, and if necessary, do it in two batches. That initial sear locks in juices and creates fond (those tasty browned bits) on the pan, which will dissolve into your sauce, adding incredible depth.
5. The Gradual Sauce Pour
When it’s time to bring everything together, don’t just dump the sauce in. Pour it in a slow, steady stream around the edges of the hot pan while continuously tossing the noodles and chicken with tongs. This allows the sauce to thicken evenly as it hits the heat, coating every ingredient in a perfect, clingy glaze rather than clumping in one spot.
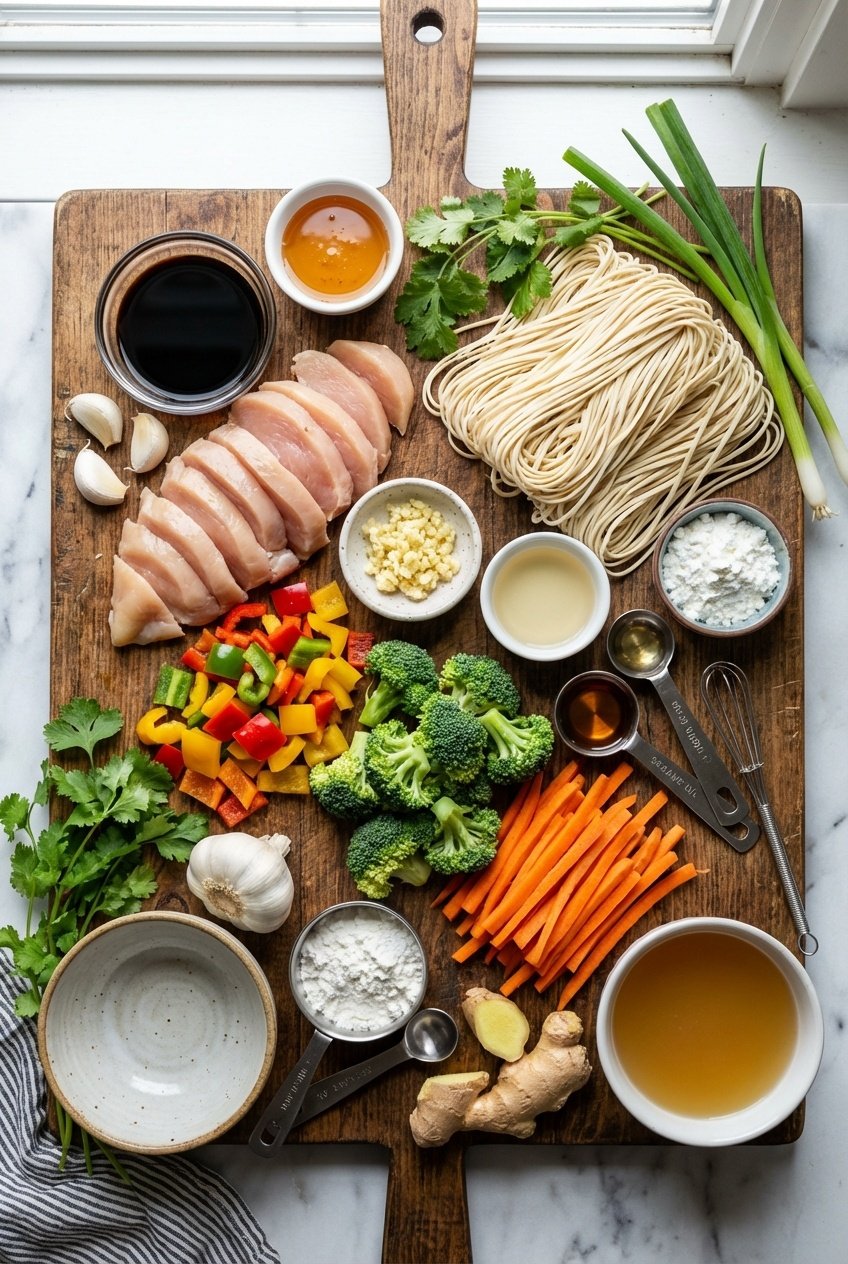
Ingredients Needed for Irresistible Garlic Chicken Noodles
This recipe is beautifully modular. The core ingredients create the iconic dish, while the vegetables and garnishes let you customize it to your heart’s content.
For the Chicken & Marinade:
- 1 lb boneless, skinless chicken breasts or thighs: Thighs are more forgiving and stay juicier, but breasts work perfectly if sliced thinly. For a shortcut, use shredded rotisserie chicken (add it when you combine the noodles and sauce).
- 1 tbsp soy sauce: This starts the seasoning process.
- 1 tsp honey: Helps with caramelization during searing.
- 2 cloves garlic, minced: We’re building that garlic flavor from the inside out.
For the Sticky Garlic Sauce (The Game-Changer!):
- ⅓ cup soy sauce: Use low-sodium if you’re sensitive to salt. For a gluten-free version, substitute tamari or coconut aminos.
- 3 tbsp honey or pure maple syrup: Honey gives a classic sticky sweetness. Maple syrup offers a deeper, more caramel-like note.
- 1 tbsp rice vinegar: The essential bright note that balances the sweetness. White wine vinegar or apple cider vinegar can work in a pinch.
- 2 tsp sesame oil: Use toasted sesame oil for its intense, nutty aroma. Do not substitute with plain sesame oil.
- 1 tbsp cornstarch: The magic thickener for our glossy sauce.
- 4-5 large cloves garlic, minced: Yes, this much! This is where the garlic sauce earns its name.
- ½ cup chicken broth or water: Broth adds another layer of savory flavor.
For the Noodles & Vegetables:
- 8 oz dried noodles: Lo-mein egg noodles, udon, ramen noodles (discard the seasoning packet), or even spaghetti in a pinch. For a lighter take, try zucchini noodles (add them raw at the very end).
- 1 tbsp neutral oil: Avocado, vegetable, or canola oil for high-heat cooking.
- 3 cups mixed vegetables (optional but recommended): Such as 1 bell pepper (sliced), 1 large carrot (julienned), and 1 cup broccoli florets. Snap peas, mushrooms, and baby corn are also fantastic.
For Garnish (Highly Recommended):
- Sliced green onions
- Toasted sesame seeds
- Crushed red pepper flakes
- A lime wedge for spritzing
Step-by-Step Instructions
Follow these detailed steps for perfect, foolproof Garlic Chicken Noodles every time.
Step 1: Prep All Components (Mise en Place)
Stir-fries move fast, so having everything ready is crucial.
- Slice the Chicken: Cut chicken into thin, uniform strips or bite-sized pieces. This ensures quick, even cooking.
- Marinate the Chicken: In a medium bowl, combine the chicken strips with 1 tbsp soy sauce, 1 tsp honey, and 2 minced garlic cloves. Toss to coat thoroughly and let it sit for 15-30 minutes at room temperature (or up to 2 hours in the fridge).
- Cook the Noodles: Boil your chosen noodles according to package directions until al dente. Drain and rinse under cold water to halt cooking. Toss with a tiny drizzle of oil to prevent sticking and set aside.
- Make the Sticky Garlic Sauce: In a separate bowl or large measuring cup, whisk the ½ cup cold chicken broth with 1 tbsp cornstarch until completely smooth and milky. Then, whisk in the ⅓ cup soy sauce, 3 tbsp honey, 1 tbsp rice vinegar, 2 tsp sesame oil, and the remaining 4-5 minced garlic cloves. Set this sauce slurry aside.
- Prep Vegetables: Slice all your chosen vegetables into uniform, bite-sized pieces.
Step 2: Cook the Chicken to Golden Perfection
- Heat a large wok or heavy-bottomed skillet over medium-high heat until very hot. Add 1 tablespoon of neutral oil and swirl to coat.
- Add the marinated chicken in a single layer, spreading it out. Let it sear undisturbed for 2-3 minutes to develop a golden-brown crust.
- Flip and stir-fry for another 2-3 minutes until the chicken is cooked through and no longer pink in the center. Using tongs, transfer the cooked chicken to a clean plate.
Step 3: Stir-Fry the Vegetables
- In the same hot pan (add another teaspoon of oil if it looks dry), add your harder vegetables first (like carrots and broccoli). Stir-fry for 2 minutes.
- Add softer vegetables (like bell peppers) and stir-fry for an additional 1-2 minutes until all vegetables are vibrant in color and crisp-tender. You want them to retain some bite.
Step 4: The Grand Finale – Combine & Glaze
- Return the cooked chicken to the pan with the vegetables.
- Add the cooked, drained noodles to the pan.
- Give your prepared garlic sauce a final quick whisk (the cornstarch may have settled) and pour it slowly around the edges of the hot pan.
- Immediately start tossing and stirring everything vigorously with tongs or a spatula. The sauce will begin to bubble and thicken almost instantly.
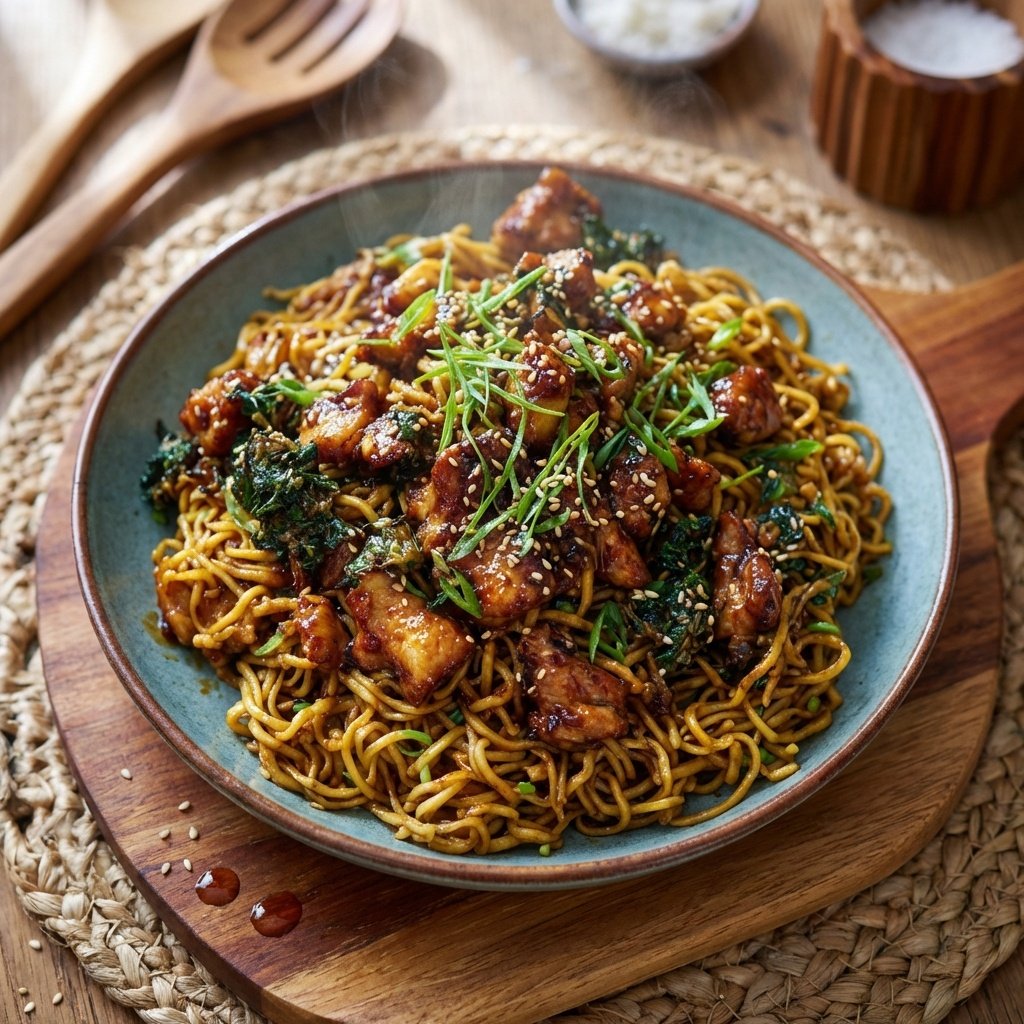
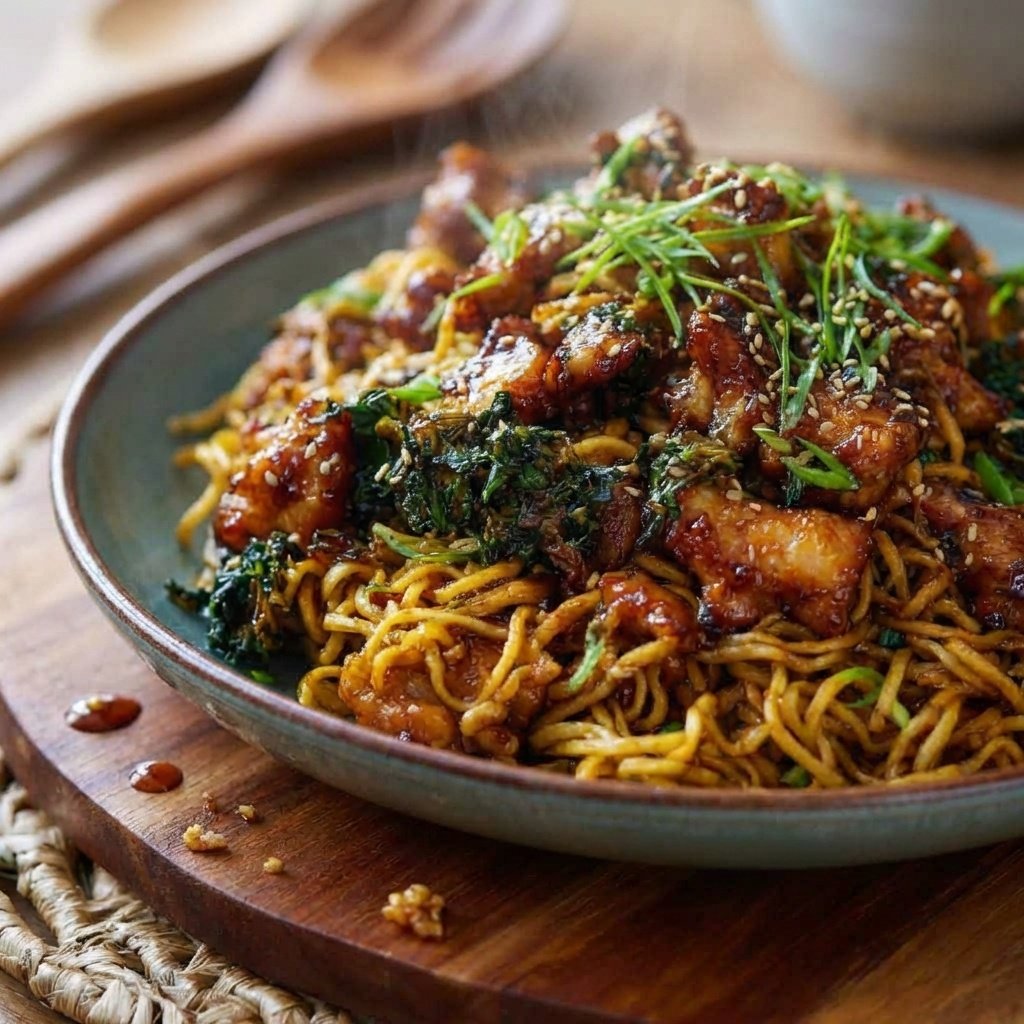
- Continue tossing for 1-2 minutes until the sauce is thickened, glossy, and coats every single piece of chicken, vegetable, and noodle beautifully. The noodles should look shiny and irresistible.
Step 5: Serve Immediately
- Remove the pan from the heat.
- Divide the sticky garlic chicken noodles among bowls.
- Garnish generously with sliced green onions, a sprinkle of toasted sesame seeds, and a pinch of red pepper flakes for heat.
- Serve hot and enjoy the symphony of sweet, savory, and garlicky flavors!
How to Customize Your Noodles
This recipe is a perfect canvas for your creativity and a great way to clean out the fridge.
Protein Swaps:
- Shrimp: Use peeled, deveined large shrimp. They cook in just 2-3 minutes.
- Beef: Use thinly sliced flank steak or sirloin. Sear quickly over high heat.
- Tofu: Use extra-firm tofu, pressed and cubed. Pan-fry until golden and crispy before proceeding.
- Pork: Thinly sliced pork tenderloin or ground pork are excellent alternatives.
Vegetable Add-Ins:
Think of this as a clean-out-the-produce-drawer opportunity. Great additions include:
- Sliced mushrooms (they soak up the sauce wonderfully)
- Sugar snap peas or snow peas
- Baby corn or water chestnuts for crunch
- Bok choy or spinach (add leafy greens at the very end)
- Shredded cabbage or kale
Sauce Variations:
- Spicy: Add 1-2 tbsp of sriracha, gochujang, or a dollop of chili crisp to the sauce.
- Ginger-Garlic: Add 1 tbsp of freshly grated ginger to the sauce.
- Citry Twist: Add the zest and juice of one lime or orange to the sauce for a bright, tangy note.
- Peanutty: Whisk in 2 tablespoons of creamy peanut butter or a splash of peanut sauce.
Storage and Reheating Tips
Short-Term Storage:
Store any leftovers in an airtight container in the refrigerator for up to 3-4 days. The noodles may absorb some of the sauce, but they will still taste delicious.
The Best Reheating Method:
Reheating is key to restoring that just-made texture. Do not microwave as it can make the noodles rubbery.
- Place the desired portion in a non-stick skillet over medium-low heat.
- Add a splash of water, chicken broth, or a tiny bit of extra sauce (about 1-2 tablespoons).
- Cover with a lid and let it steam for 2-3 minutes until heated through.
- Remove the lid, give everything a good stir, and let any excess liquid cook off for a minute. This gently rehydrates and reheats the noodles without overcooking them.
Can You Freeze Garlic Chicken Noodles?
It’s possible, but with a caveat. The noodles can become mushy upon thawing and reheating. If you must freeze, do so in a single layer first on a baking sheet before transferring to a freezer bag to prevent a solid block. Reheat from frozen in a skillet with a splash of broth, as described above, but expect a softer texture. The sauce and chicken freeze very well.
How to Make a Big Batch for Meal Prep
This recipe scales up beautifully for weekly meal prep.
- Double or Triple: Simply multiply all ingredients. Cook the chicken and vegetables in larger batches, potentially in two separate pans to avoid steaming.
- Prep Components Separately: For the best texture, store the cooked noodles, chicken/vegetable mix, and the sauce (whisked and uncooked) in separate containers in the fridge for up to 4 days.
- Assemble to Order: When ready to eat, heat a portion of the chicken and veg mix in a pan, add a portion of noodles, and then whisk and pour over the correct proportion of sauce. Toss until glossy and heated through. This keeps the noodles from getting soggy.
Frequently Asked Questions (FAQ)
Can I use a different type of noodle?
Absolutely! This is one of the most versatile parts of the recipe. Egg noodles, udon, ramen, soba, rice noodles, or even whole-wheat spaghetti all work wonderfully. Just adjust the cooking time according to the package directions for al dente. For a low-carb option, spiralized zucchini or sweet potato noodles are great—add them raw at the very end of cooking and just toss to warm through.
My sauce didn’t get thick and sticky. What went wrong?
The most common culprit is that the cornstarch slurry wasn’t properly activated. Ensure you whisk the cornstarch with a cold liquid first. Also, the pan needs to be sufficiently hot when you add the sauce for it to come to a simmer and thicken properly. If your sauce is too thin, mix an additional 1 tsp cornstarch with 1 tbsp cold water and stir it into the simmering pan mixture.
Can I make this gluten-free?
Easily! Use tamari or certified gluten-free soy sauce/coconut aminos in both the marinade and the sauce. Ensure your noodles are a gluten-free variety, such as rice noodles, 100% buckwheat soba, or chickpea pasta.
What’s a good substitute for honey in the sauce?
Pure maple syrup is an excellent 1:1 substitute. For a sugar-free version, you can use a brown sugar substitute like Swerve Brown or monk fruit sweetener, though the texture of the sauce may be slightly less glossy.
I don’t have rice vinegar. What can I use?
White wine vinegar or apple cider vinegar are the best substitutes. Use the same quantity. In a pinch, you can use half the amount of distilled white vinegar, as it’s more potent.
How can I make this recipe spicier?
You have many options! Add 1-2 teaspoons of crushed red pepper flakes to the sauce, stir in a tablespoon of sriracha or chili-garlic sauce, or garnish with sliced fresh jalapeños or a drizzle of chili oil.
Ultimate Sticky Garlic Chicken Noodles – Irresistibly Sweet, Savory & Flavorful
Ingredients
Chicken & Marinade
- 1 lb chicken breast or thighs thinly sliced
- 1 tsp soy sauce
- 1 tsp honey
- 1 clove garlic minced
Noodles
- 8 oz noodles egg noodles, udon, or rice noodles
Vegetables (optional)
- 1 bell pepper thinly sliced
- 1 cup broccoli florets
- 1 carrot julienned
Sticky Garlic Sauce
- 3 tbsp soy sauce
- 1 tbsp honey or maple syrup
- 1 tbsp rice vinegar
- 1 tsp sesame oil
- 1 tsp cornstarch or arrowroot
- 2 cloves garlic minced
- 0.25 cup water or chicken broth
Garnish (optional)
- sesame seeds
- chopped scallions
- chili flakes
Instructions
- Prepare all ingredients by thinly slicing the chicken, chopping the vegetables, and cooking the noodles according to package directions before draining and setting them aside.
- Marinate the chicken by combining it with soy sauce, honey, and minced garlic in a bowl, then let it rest for 15 to 30 minutes to absorb the flavors.
- Whisk together the soy sauce, honey, rice vinegar, sesame oil, minced garlic, cornstarch, and water or broth in a separate bowl until the sauce is completely smooth.
- Heat oil in a wok or large skillet over medium-high heat, then sear the marinated chicken until it turns golden brown and is fully cooked through, which takes about 4 to 5 minutes, before removing it from the pan.
- Stir-fry the vegetables in the same pan for 2 to 3 minutes until they become crisp-tender, adding a bit more oil if necessary.
- Combine the noodles and sauce by returning the cooked chicken to the pan, adding the noodles, and gradually pouring in the sauce while tossing everything together to coat evenly, then cook for 1 to 2 minutes until the sauce thickens and the noodles become glossy.
- Serve the Garlic Chicken Noodles immediately by plating them and garnishing with sesame seeds, chopped scallions, or chili flakes for added flavor and presentation.
Equipment
- Wok or large skillet
- Mixing bowls
- Whisk
- Spatula
- Tongs
- Knife
- Cutting Board
- Measuring cups
- Measuring spoons