This is the ultimate recipe for the most incredibly simple and delicious Coconut Jelly vegan dessert. With just four common pantry ingredients, you can create perfectly sweet, jiggly cubes of tropical delight that will wow your friends and family. The best part? This entire Thai dessert recipe comes together with a simple kitchen secret, and there's absolutely no agar agar required! Each creamy bite melts in your mouth, offering a refreshing and light treat perfect for any occasion.
When I first started developing this coconut jello recipe, I was determined to find a method that didn't rely on specialty gelling agents. My first few batches were either too soft or too firm. The breakthrough came when I realized the magic was in the cooking time—you need to thicken the cornstarch mixture until it has the rich consistency of Greek yogurt. This is the must-try secret that guarantees a perfect set every single time.

Why You'll Love This No Agar Agar Coconut Jelly
- Effortlessly Simple: With only 4 basic ingredients and a straightforward process, this is one of the easiest Thai desserts you can make at home.
- No Special Ingredients: This recipe proves you don't need agar agar for a fantastic jelly. Cornstarch, a common pantry staple, creates an amazing, creamy, and tender texture.
- Perfectly Creamy & Jiggly: Forget rubbery jellies. This coconut milk jelly is soft, smooth, and has a satisfying jiggle that's simply irresistible.
- Naturally Vegan & Gluten-Free: This recipe is naturally free from animal products and gluten, making it a wonderful dessert for everyone to enjoy.
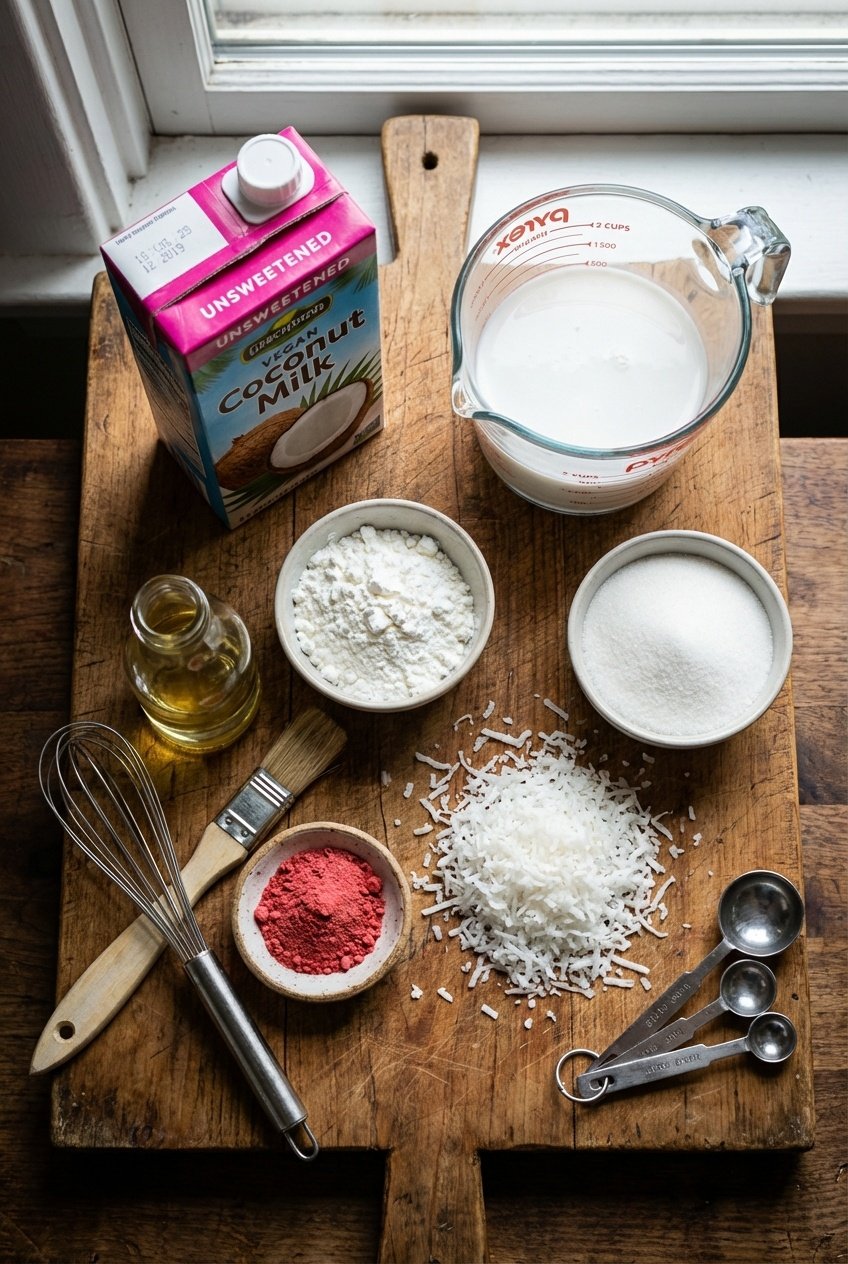
Ingredients You'll Need
This coconut jelly recipe uses simple ingredients, but the type of coconut milk is crucial for the perfect texture.
- Coconut Milk: You'll need 2 cups of unsweetened, carton-style coconut milk (the kind you find in the refrigerated or shelf-stable beverage aisle). Do not use canned coconut milk. Canned varieties are much thicker and higher in fat, which will prevent the jelly from setting correctly.
- Cornstarch: This is our magic thickening agent that replaces the need for agar agar or gelatin.
- Granulated Sugar: Provides a clean, balanced sweetness. You can adjust the amount slightly to your taste.
- Shredded Coconut: Use unsweetened shredded or desiccated coconut for coating the cubes. For extra flavor, toast it lightly in a dry pan until it smells nutty and fragrant.
Step-by-Step Instructions

Learning how to make coconut jelly is incredibly easy. The key is to stir constantly while cooking to achieve a smooth, lump-free consistency.
- Prep Your Container: Lightly brush a thin layer of neutral oil (like vegetable or coconut oil) inside a small rectangular food storage container or a shallow dish (an 8×4 inch loaf pan works well). This ensures the jelly unmolds easily. Set it aside.
- Mix the Ingredients: In a medium bowl, whisk together the coconut milk, cornstarch, and sugar until no lumps remain.
- Strain for Smoothness: Place a fine-mesh strainer over a nonstick saucepan. Pour the coconut milk mixture through the strainer to catch any final lumps. Use a spatula to press any small clumps through the mesh. This step is non-negotiable for a silky-smooth coconut jelly dessert.
- Cook and Thicken: Place the saucepan over medium-high heat. Stir continuously with a spatula, scraping the bottom and sides of the pan. As it heats up, the mixture will begin to thicken. Once it starts to bubble, reduce the heat to medium-low and continue stirring constantly for about 5 minutes. The mixture is ready when it is very thick—it should have a consistency slightly thicker than Greek yogurt. It will cling to your spatula for a few seconds before slowly dropping off.
- Chill to Set: Immediately pour the thickened mixture into your prepared container and smooth the top. Let it cool to room temperature. Once cool, press a piece of plastic wrap directly onto the surface of the jelly to prevent a skin from forming. Refrigerate for at least 4 hours, or overnight, until completely firm.
- Cut and Coat: Once fully chilled and set, carefully run a knife around the edges of the container and invert the jelly onto a cutting board. Cut it into bite-sized cubes.
- Serve: Place the shredded coconut in a shallow bowl. Gently roll each cube in the coconut until all sides are evenly coated. Serve chilled and enjoy!
Tips for Perfect Coconut Jelly
Get the Thickness Right
The most common mistake is not cooking the mixture long enough. It must be very thick before you pour it into the container. If it's too thin, it won't set properly, no matter how long it chills. Remember the "thicker than Greek yogurt" rule!
Don't Skip the Strainer
Straining the mixture before heating is the secret to a perfectly smooth, professional-quality texture. It removes any small cornstarch lumps that didn't dissolve.
Patience is Key
Allow the jelly to cool to room temperature before covering and refrigerating. Placing hot food in the fridge can raise its internal temperature. Chilling for at least 4 hours ensures the center is fully set and not sticky.
Frequently Asked Questions (FAQ)
My coconut jelly didn’t set! What went wrong?
Can I use canned coconut milk?
Can I use a different starch like tapioca or potato starch?
How should I store this coconut jelly dessert?
The Ultimate Vegan Coconut Jelly (4 Ingredients, No Agar Agar)
Ingredients
- 2 cups unsweetened coconut milk from a carton, not canned
- 1/2 cup cornstarch
- 1/4 cup granulated sugar
- 1/2 cup shredded coconut for coating
- 1/4 tsp vegetable oil for greasing the container
- 2 tbsp freeze-dried strawberry powder optional, for strawberry flavor
Instructions
- Prepare your container by lightly brushing a rectangular food storage container or shallow dish with a thin layer of vegetable oil, then set it aside.
- Combine the coconut milk, cornstarch, and sugar in a large mixing bowl. Whisk thoroughly until no lumps remain. If using, stir in the optional freeze-dried strawberry powder for a fruity flavor.
- Strain the mixture by pouring it through a fine-mesh sieve set over a nonstick pan. Use a spatula to press any remaining clumps through the strainer to ensure a smooth consistency.
- Heat the mixture over medium-high heat, stirring constantly with a spatula. Once it begins to boil, reduce the heat to medium-low and continue to stir for about 5 minutes, or until it thickens to a consistency slightly thicker than Greek yogurt.
- Pour the thickened mixture into your prepared greased container. Let it cool to room temperature, then cover the surface directly with plastic wrap to prevent a skin from forming. Chill in the refrigerator for at least 4 hours, or overnight, until completely firm.
- Unmold the set jelly by carefully turning the container upside down onto a cutting board. Slice the jelly into small, bite-sized cubes.
- Coat the jelly cubes by placing the shredded coconut in a shallow bowl. Gently roll each cube in the coconut until all sides are evenly covered. Serve your delicious coconut jelly chilled.
Equipment
- Measuring cups
- Fine-mesh strainer
- Nonstick pan
- Spatula
- Food storage container
- Plastic wrap